7.7 miles (12.3 km) with 114m of total ascent
 |
| Bluebells along Devil's Dyke between points 30 & 31 |
This is a lovely varied route that includes riverside and woodland walking as well as stretches across open rolling countryside. It involves several rights of way which are included in other walks in our collection but links them in a new loop which passes along footpath and bridleways not visited before. There is a small amount of lane walking. You will pass the '3 Brewers' brewery along the way which has a shop and a bar that are open at certain times of the week. See details in the directions below.
Fly through preview of walk
If you want to check what sort of landscape you will be crossing before you set off on this walk you can view a short 3D video of the route below. It's created using the free version of
Relive.
Directions
The walk starts and finishes in the East Lane Car Park in Wheathampstead (location -
https://w3w.co/riders.print.chain). The car park is managed by Wheathampstead Parish Council and, at the time of writing, was free of charge. Please check this is still the case before leaving your car. And make sure you don't park in the adjacent car park which belongs to The Bull (location -
https://w3w.co/begin.empty.market) which is for customers only and which will incur a fine if used by non-customers.
There are public toilets at the entrance to the East Lane Car Park (location -
https://w3w.co/firmly.gentle.spit).
 |
Map for Walk 258: Wheathampstead South-East Loop
Click on the map above for a larger version
Created on Map Hub by Hertfordshire Walker
Elements © Thunderforest © OpenStreetMap contributors
There is an interactive map below these directions |
Those with GPS devices can download
GPX or
KML files for this walk. We've added
What3Words location references for those who use that system. If you print these walks you might want to use the green
PrintFriendly icon at the bottom of these directions to delete elements such as photographs.
.jpeg) |
| The East Lane Car Park, Wheathampstead |
1: Leave the East Lane Car Park then turn left and head E along East Lane then continue as the lane bends NE and becomes Meads Lane. Continue for 220m until Meads Lane ends and becomes a track leading into a park (location -
https://w3w.co/shady.cafe.signal).
Continue heading NE, now on Wheathampstead
footpath 71, for 75m until you reach a footpath on your left leading to a footbridge over the River Lea (location -
https://w3w.co/ranges.comet.club), see image below with an orange arrow showing the direction of travel.
 |
| Turn left then cross the River Lea on a footbridge |
2: Turn left then head NNW crossing the River Lea on a footbridge. This seems to be a popular spot for people to take their children and dogs for a paddle in the river.
 |
| Immediately after crossing the River Lea turn right |
Immediately after crossing the River Lea turn right (location -
https://w3w.co/quite.needed.cable) then follow the path NE then E for 220m until you join Wheathampstead
bridleway 12 (location -
https://w3w.co/twig.builds.bunk), see image below.
 |
| Turn right on Wheathampstead bridleway 12 |
3: Turn right then follow Wheathampstead bridleway 12 as it heads SE for 330m until you reach a gate where the path bends right (location -
https://w3w.co/hired.edges.sport).
Go through the gate then follow Wheathampstead bridleway 12 as it heads SSE, for 135m until you reach a left turn leading to a junction (location -
https://w3w.co/legend.finishing.grain), see image below.
* As you walk this stretch you will notice a gap in the hedgerow on the left (location - https://w3w.co/called.calms.stray) leading to stairs. This is a shortcut to the next right of way and avoids what can be a flooded section after rain.
 |
| Turn left on Wheathampstead BOAT 4 |
4: Turn left on Wheathampstead BOAT 4 (
byway open to all traffic) then head NNE for 55m until you reach an underpass.
* Just before the underpass you will see the bottom of the steps (location - https://w3w.co/patch.woke.help) mentioned in the shortcut above.
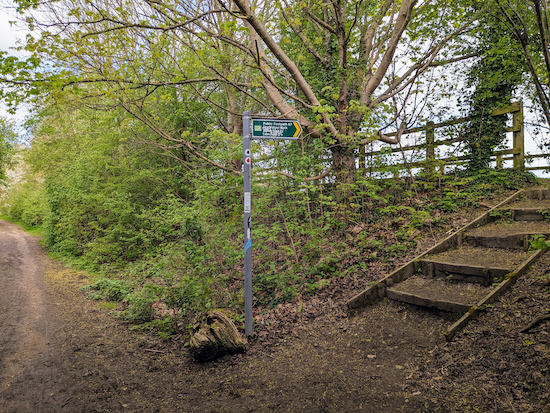
Continue through the underpass until you reach a footpath on the right (location -
https://w3w.co/hugs.lists.hood), see image below.
 |
| Turn right on Wheathampstead footpath 67 |
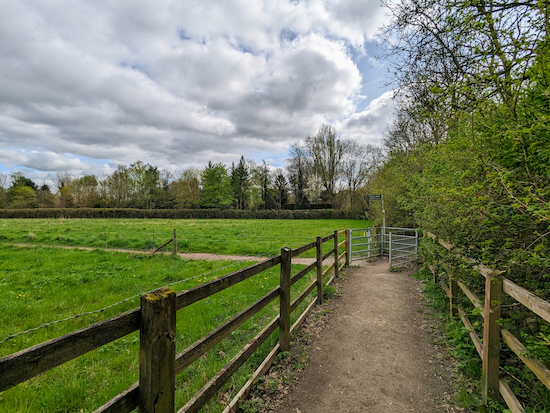
5: Turn right on Wheathampstead footpath 67 then head SSE for 90m before the footpath bends left at a gate (location -
https://w3w.co/deck.fancy.lawn), see image below.
 |
| Turn left then continue on Wheathampstead footpath 67 |
Turn left then continue on Wheathampstead footpath 67, now heading NE, with the River Lea on the right. Continue for 160m until you reach a bench-with-a view (location -
https://w3w.co/drip.scope.wages), see image below.
.jpeg) |
| The bench on Wheathampstead footpath 67 |
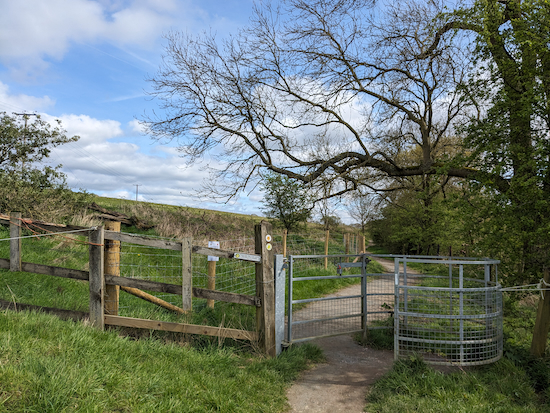
Continue past the bench for 530m until you reach a gate (location -
https://w3w.co/period.rocky.crush), see image below.
 |
| Continue heading along Wheathampstead footpath 67 |
Continue heading along Wheathampstead footpath 67 in an easterly direction, still with the River Lea on your right, for 685m until you reach a junction (location -
https://w3w.co/drape.races.brand).
7: Ignore a path on the left and keep heading straight and in an easterly direction with the River Lea on the right but now on Wheathampstead bridleway 18. Continue for 455m until you reach Waterend Lane (location -
https://w3w.co/highs.lights.sweep), see image below.
 |
| Take the footpath on the left just before the ford |
8: Turn right on Waterend Lane then head SSW for 55m until you reach a footpath on the left just before a ford and a footbridge (location -
https://w3w.co/cube.fails.ripe).
Turn left on Wheathampstead footpath 13 then head SE for 595m until you reach a footpath junction (location -
https://w3w.co/cases.enable.whips), see image below with the direction of travel marked with an orange arrow.
 |
| Continue heading straight and climbing uphill |
9: Continue heading straight and climbing uphill (it's steep at this point) in an easterly direction, first on Wheathampstead footpath 13 and then, after 35m where you cross a parish boundary, along Hatfield footpath 57 (location -
https://w3w.co/cope.wire.games).
Continue on Hatfield footpath 57 through woodland until you emerge from the woodland and reach the Brocket Hall golf course (location -
https://w3w.co/judges.weds.slips), see image below.
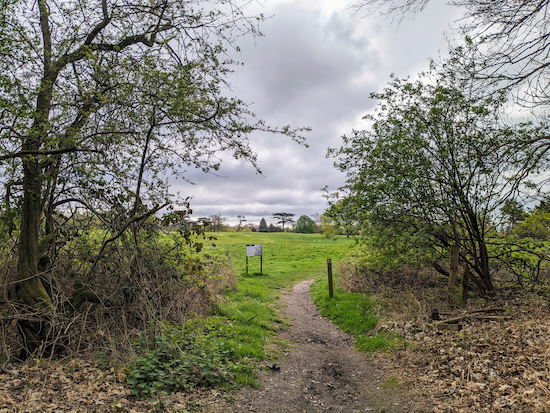 |
| Hatfield footpath 57 as it reaches the golf course |
10: Follow Hatfield footpath 57 across the golf course, taking care to look right then left when crossing two fairways.
 |
| Head SE across the golf course |
Continue, heading SE across the golf course for 535 until you reach a metalled track (location -
https://w3w.co/snap.sunk.fried), see image below.
 |
| Cross the track then continue on Hatfield footpath 57 |
11: Cross the track then continue on Hatfield footpath 57, now heading SE, for 270m until you reach a junction (location -
https://w3w.co/focus.took.slows), see image below.
 |
| Turn right at the junction on a permissive path |
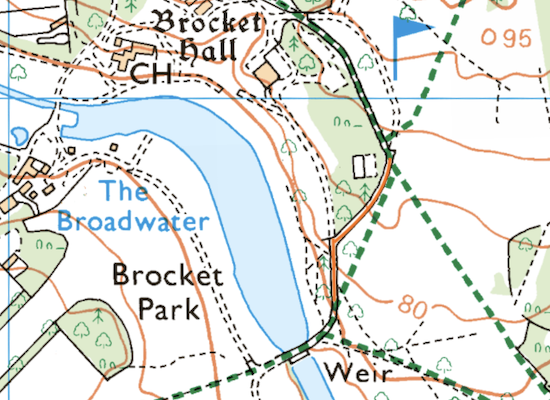
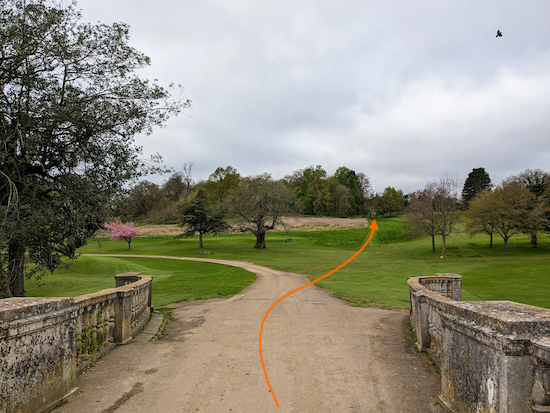
12: Turn right at the junction then head SSW on a
permissive path which runs along a surfaced track at the side of Hatfield footpath 59 for 370m until you reach
Paine Bridge, a Grade II* listed structure (location -
https://w3w.co/slick.actor.spends), see images below.
 |
| The permissive path marked in orange |
 |
| The permissive path leading to Paine Bridge |
 |
| Hatfield footpath 59 crossing Paine Bridge |
 |
After crossing Paine Bridge head straight and WSW uphill
|
13: Cross Paine Bridge on Hatfield footpath 59 then head straight and WSW uphill for 570m, still on Hatfield footpath 59, until you reach Marford Road, (location -
https://w3w.co/tonic.drums.hidden), see image below.
At this point you could turn left to visit The Crooked Chimney (location - https://w3w.co/kite.pass.penny).
 |
| Cross Marford Road then head along Cromer Hyde Lane |
14: Cross Marford Road then head WSW along Cromer Hyde Lane for 265m until you reach a footpath on the left (location -
https://w3w.co/prone.helps.shut), see image below.
.jpeg) |
| Turn left on Hatfield footpath 50 |
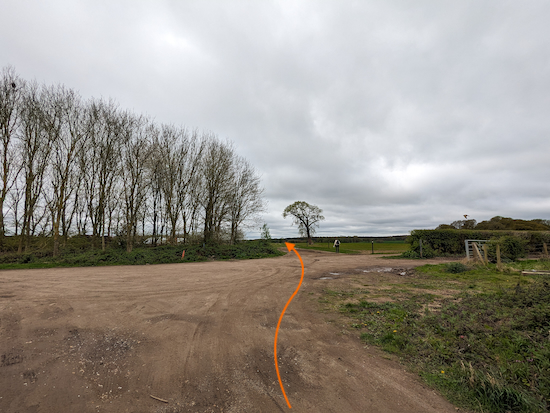
15: Turn left then head SSE on Hatfield footpath 50 for 300m until you reach a junction (location -
https://w3w.co/fact.rice.buyers), see image below.
 |
| Cross the junction, still on Hatfield footpath 50 |
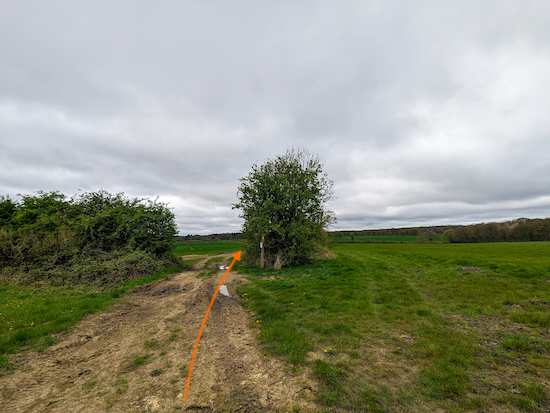
16: Cross the junction, still on Hatfield footpath 50 (see the direction of the orange arrow on the image above), then continue but now heading SW for 315m until you reach a gap in the hedge (location -
https://w3w.co/tested.drops.rabble), see image below.
 |
| Continue heading SW on Hatfield footpath 50 |
17: Continue heading SW on Hatfield footpath 50, with the hedgerow on the right, for 135m until the footpath bends right then left (location -
https://w3w.co/soon.fees.rather), see image below.
 |
| Continue heading SW on Hatfield footpath 50 |
Continue heading SW on Hatfield footpath 50 for 650m until you reach farm buildings and the '
3 Brewers Brewery' (location -
https://w3w.co/stale.winks.heads), see image below.
.jpeg) |
| The '3 Brewers' brewery |
* Beer lovers (like me) might be interested to know that there is a shop at the brewery and a bar that is also open for serving beer certain days of the week. They tell me they also serve soft drinks, tea and coffee when open. See the information boards below for shop and bar opening times.
.jpeg) |
| The '3 Brewers' brewery opening times |
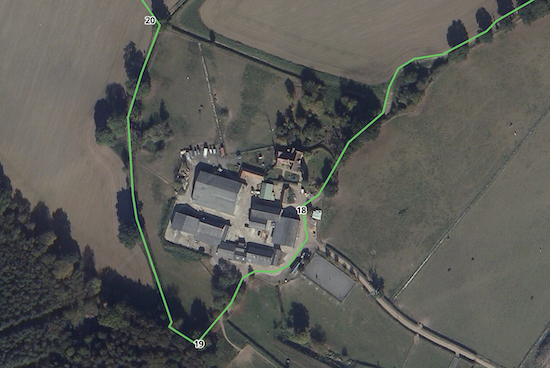 |
| The green line shows the route past the brewery |
18: Keep left at the brewery, see green line on the satellite image above. Then head SW, now on Hatfield bridleway 41, for 95m until you reach a gate (location -
https://w3w.co/debit.voter.famous), see image below.
 |
| Go through the gate, still on Hatfield bridleway 41 |
Go through the gate, still on Hatfield bridleway 41, then continue to Hammonds Lane (location -
https://w3w.co/slower.loops.float), see image below.
19: Turn right on Hammonds Lane then head WNW for 30m looking out for a bridleway on the right (location -
https://w3w.co/media.pile.apron), see image below.
 |
| Turn right on Hammonds Lane then take the bridleway on the right |
Turn right on Hatfield bridleway 49 then head NW for 250m until you reach a junction (location -
https://w3w.co/vital.space.shorts), see image below.
.jpeg) |
| Turn left on Hatfield footpath 48 |
20: Turn left on Hatfield footpath 48 then follow it NW across an arable field, see direction of travel on the image below.
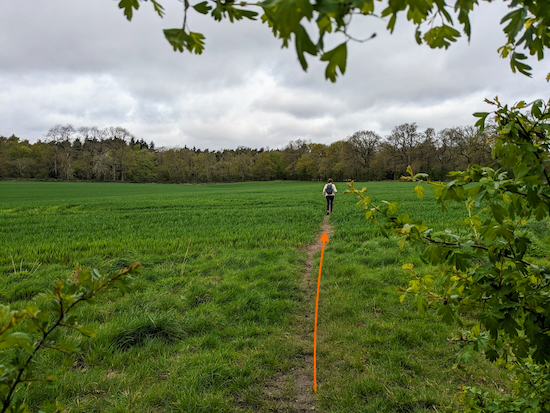 |
| Continue on Hatfield footpath 48 until you reach woodland |
Continue on Hatfield footpath 48 for 275m until you reach woodland (location -
https://w3w.co/twins.beans.bronze), see image below.
 |
| Continue through the woodland on Hatfield footpath 48 |
21: Continue following Hatfield footpath 48 NW through the woodland.
* This section can be really muddy and slippy after rain so look out for a detour on the left as soon as you reach the muddy bit where previous walkers have avoided the worst of the mud by creating an alternative route which runs parallel to the official path.
Continue for 265m until you emerge from the woodland at another arable field (location -
https://w3w.co/pest.lake.legal), see image below.
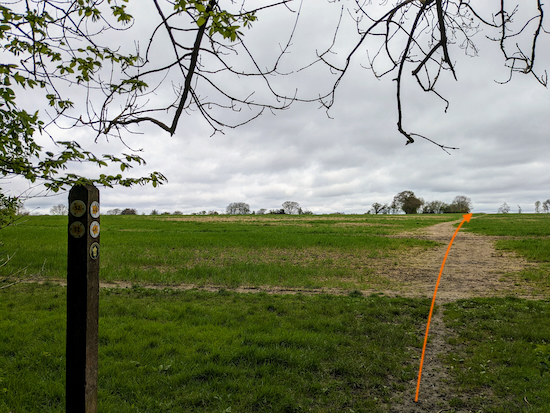 |
| Continue heading NW across the next arable field |
22: Continue heading NW across the next arable field for 330m, still on Hatfield footpath 48, until you reach a hedgerow (location -
https://w3w.co/obey.mute.really), see image below.
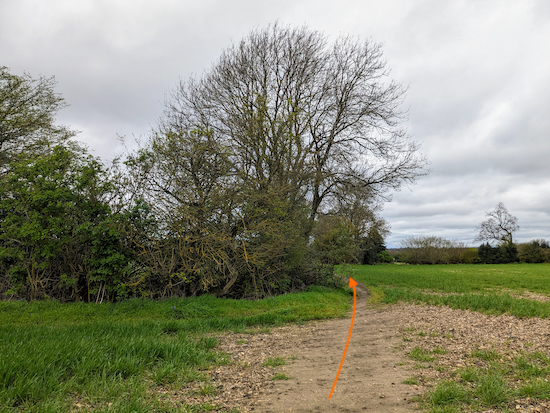 |
| Follow Hatfield footpath 48 NW with the hedgerow on the left |
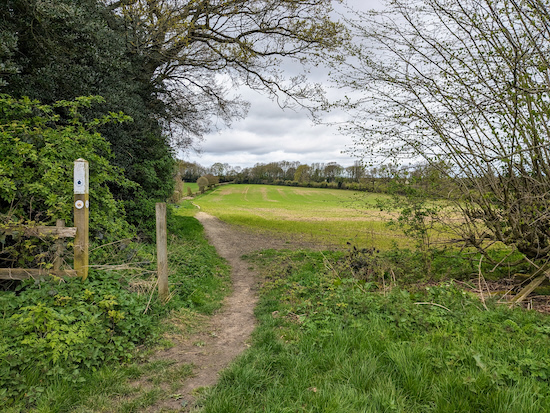
23: Follow Hatfield footpath 48 NW, with the hedgerow on the left and field on the right, for 95m until the footpath goes through a gap in the hedgerow on the left (location -
https://w3w.co/nodded.fame.passes), see image below.
 |
| Continue heading NW, still on Hatfield footpath 48 |
24: Go through the gap then continue heading NW, still on Hatfield footpath 48 and with the hedgerow on the left and the field on the right, for 475m until you reach a junction just before Coleman Green Lane (location -
https://w3w.co/fruit.decks.swim), see image below.
 |
| Turn left at the junction on Sandridge footpath 39 |
25: Turn left at the junction on Sandridge footpath 39 then head WSW for 65m crossing Coleman Green Lane (location -
https://w3w.co/ending.preoccupied.with), see image below.
 |
| After crossing Coleman Green Lane, continue heading W |
After crossing Coleman Green Lane, continue heading W for 70m to a junction (location -
https://w3w.co/agenda.margin.rivers), see image below.
 |
| Turn right at the junction on Sandridge footpath 42 |
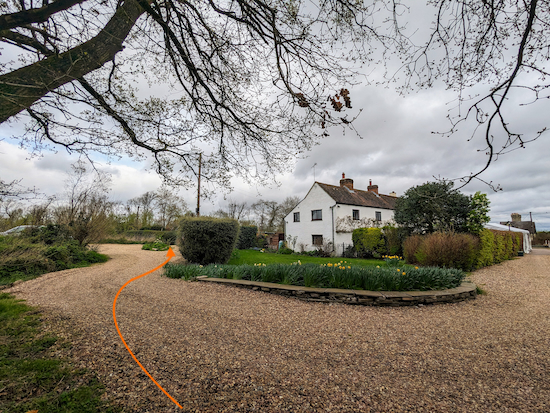
Turn right at the junction then head NE for 115m on Sandridge footpath 42 to a junction and a gravel track (location -
https://w3w.co/cheer.rested.hopes), see image below.
* At this point you could visit The John Bunyan pub (location - https://w3w.co/others.skirt.logic) and John Bunyan's Chimney, a Grade II listed building, just across the road from the pub (location - https://w3w.co/curl.scam.finely).
 |
| Turn left on Sandridge footpath 13 |
26: Turn left on Sandridge footpath 13 then head NW through woodland for 135m until you reach a gate (location -
https://w3w.co/spot.chefs.letter), see image below.
.jpeg) |
| Continue, still on Sandridge footpath 13 |
Continue, still on Sandridge footpath 13, for 285m until you reach Beech Hyde Lane (location -
https://w3w.co/cycle.faster.before), see image below.
 |
| Turn right on Beech Hyde Lane then left on Sandridge footpath 16 |
27: Turn right on Beech Hyde Lane then head W for 25m until the lane bends to the right and you reach a track on the left (location -
https://w3w.co/lately.enjoyable.civil), see orange arrow on the image above.
Follow this track, Sandridge footpath 16, as it heads NW for 255m until you reach farm buildings (location -
https://w3w.co/star.vest.spill).
28: Continue past the farm, now on Wheathampstead footpath 22, until you reach Dyke Lane (location -
https://w3w.co/hint.smart.ranged).
29: Turn right on Dyke Lane then head NNE for 265m until you reach a footpath on the right (location -
https://w3w.co/gently.until.mental), see image below.
 |
| Turn right on Wheathampstead footpath 23 |
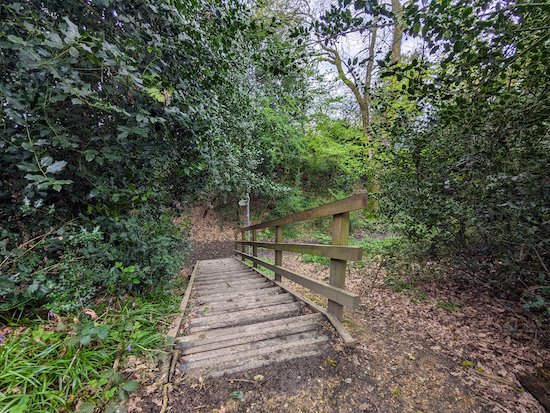
30: Turn right on Wheathampstead footpath 24 then keep right then head SE for 20m until you reach a set of wooden stairs (location -
https://w3w.co/shapes.safely.task) see image below.
 |
| Descend the steps then turn left on Wheathampstead footpath 23 |
Descend the steps then turn left at the bottom on Wheathampstead footpath 23 then follow it NNE along Devil's Dyke.
According to Wikipedia:
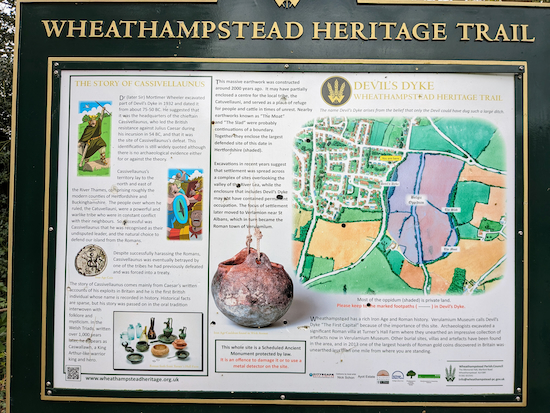
"Devil's Dyke is the remains of a prehistoric defensive ditch which lies at the east side of the village of Wheathampstead, Hertfordshire, England. It is protected as a Scheduled Monument.[1] It is generally agreed to have been part of the defences of an Iron Age settlement belonging to the Catuvellauni tribe of Ancient Britain. It has possible associations with Julius Caesar's second invasion of Britain (54 BC)."
Continue on Wheathampstead footpath 23 for 550m until it rejoins Dyke Lane where you will find an information board (location -
https://w3w.co/grit.levels.stage), see image below.
 |
| The information board at Devil's Dyke |
31: Turn right on Dyke Lane then head NE for 145m until you reach Marford Road (location -
https://w3w.co/factor.noisy.ports), see image below.
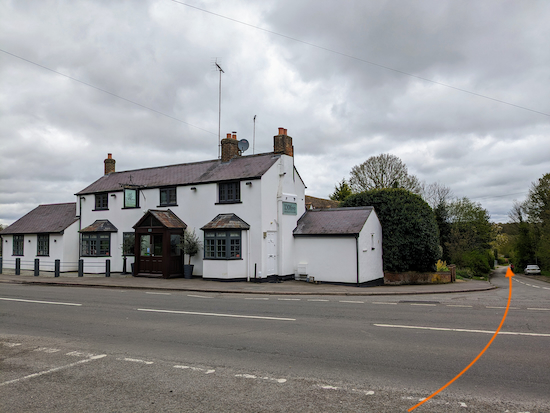 |
| Cross Marford Road then head N on Sheepcote Lane |
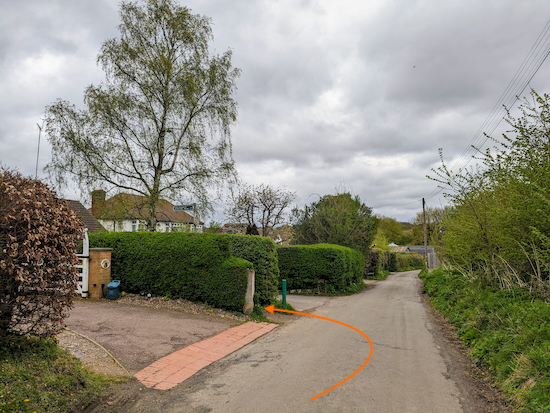
32: Cross Marford Road then head N on Sheepcote Lane for 180m looking out for a footpath on the left (location -
https://w3w.co/appear.dare.rapid), see image below.
 |
| Turn left on Wheathampstead footpath 73 |
33: Turn left on Wheathampstead footpath 73 then head W for 165m until you reach a footpath junction (location -
https://w3w.co/appear.dare.rapid), see image below.
 |
| Turn right on Wheathampstead footpath 71 |
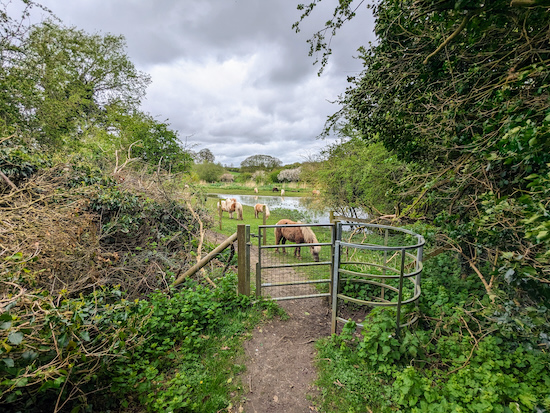
34: Turn right on Wheathampstead footpath 71 then head NE for 125m to a left-hand bend then a gate (location -
https://w3w.co/deep.began.waters).
 |
| Continue on Wheathampstead footpath 71 |
Continue on Wheathampstead footpath 71 but now heading NW then W for 295m until you reach a grassy area with picnic benches called River Park (location -
https://w3w.co/waddled.loving.yarn), see image below.
.jpeg) |
| Continue across River Park |
Continue across River Park until you reach the path you walked at point 2 in the walk (location -
https://w3w.co/teams.planet.shadow).
35: Continue heading SSW for 35m until you reach Meads Lane (location -
https://w3w.co/clues.input.brains) then retrace your steps back to the East Lane Car Park and the start of the walk.
If you enjoyed this walk please consider joining our
Hertfordshire Walker members-only Facebook Group where you can share photos and comments on your walking experiences.
Interactive map

.jpeg)


.jpeg)


.jpeg)


.jpeg)
.jpeg)


.jpeg)


.jpeg)


.jpeg)


No comments:
Post a Comment