6 miles (9.7 km) with 70m of total ascent
 |
| The River Rib between points 21 & 22 |
This walk explores the countryside east of Thundridge and south of the River Rib. It shares a section of bridleway that features in
Walk 91: Wadesmill East Loop and also passes the remains of the medieval church of St Mary and All Saints.
Fly through preview of walk
If you want to check what sort of landscape you will be crossing before you set off on this walk you can view a short 3D video of the route below. It's created using the free version of
Relive.
Directions
.jpeg) |
Map for Walk 257: Thundridge East Loop
Click on the map for a larger version
Created on Map Hub by Hertfordshire Walker
Elements © Thunderforest © OpenStreetMap contributors
There is an interactive map below the directions |
Those with GPS devices can download
GPX or
KML files for this walk. We've added
What3Words location references for those who use that system. If you print these walks you might want to use the green
PrintFriendly icon at the bottom of these directions to delete elements such as photographs.
This walk starts and finishes close to the junction of the A1170 and Cold Christmas Lane (location -
https://w3w.co/splash.backed.table) near a play area and the ground of Ware Lions FC. Alternatively, you could start and end the walk at point 26 (location -
https://w3w.co/really.orders.combining) if you wanted to be closer to refreshments in Thundridge and Wadesmill at the end of the walk.
1: With your back to the A1170 head E along Cold Christmas Lane for 500m until you cross the A10 on a road bridge (location -
https://w3w.co/blur.grows.shell). After crossing the A10, continue along Cold Christmas Lane for 90m until you reach a
footpath on the right (location -
https://w3w.co/zones.waters.rarely), see image below.
 |
| Turn right on Thundridge footpath 53 |
2: Turn right on Thundridge footpath 53 then head SW for 390m, with the A10 on your right and a field on your left, until you reach a bend (location -
https://w3w.co/galaxy.sheep.sweep), see image below.
 |
| Turn left on Thundridge footpath 21 |
3: Turn left on Thundridge footpath 21 then head SE for 90m with the hedgerow on your right before turning right through the hedgerow (location -
https://w3w.co/slang.sculpture.lonely), see orange arrow on the image below.
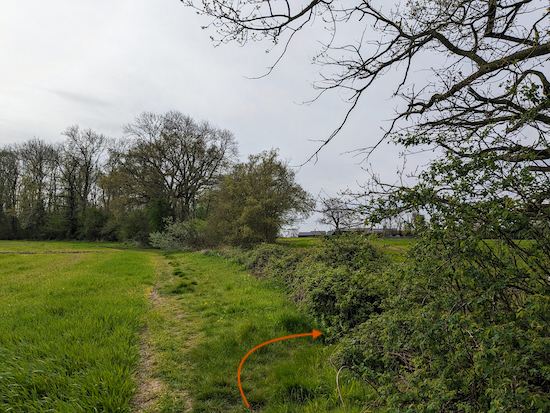 |
| Once through the hedgerow turn left |
Once through the hedgerow turn left to continue on Thundridge footpath 21 but now with the hedgerow on the left. After 25m you will reach woodland (location -
https://w3w.co/silks.foal.joined), see image below.
 |
| Keep to the right at the woodland |
Keep to the right at the woodland then continue on Thundridge footpath 21 now heading S with the woodland on your left for 80m until you reach the end of the woodland (location -
https://w3w.co/garage.cloak.bigger) then head SSW see image below.
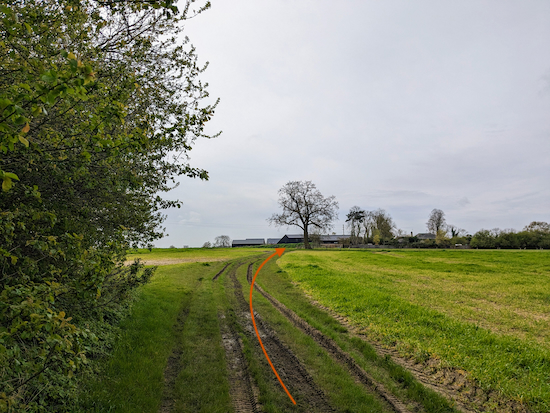 |
| Continue on Thundridge footpath 21 now heading SSW |
Continue, now heading SSW and still on on Thundridge footpath 21 for 150m until you reach a gate (location -
https://w3w.co/tolls.host.frogs), see image below.
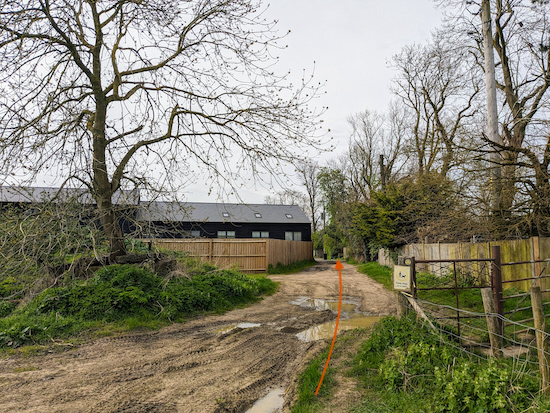 |
| Continue, still on Thundridge footpath 21 |
Continue, still on Thundridge footpath 21, passing new housing on the left and right for 130m until you reach a junction (location -
https://w3w.co/bossy.remote.icons), see image below.
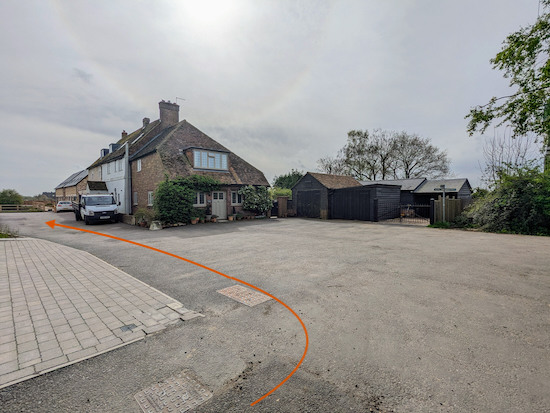 |
| Turn left on Thundridge bridleway 20 |
4: Turn left on Thundridge
bridleway 20 then head E, passing a pond on the right (location -
https://w3w.co/desk.being.shadow), see image below.
 |
| Continue past the pond heading E on Thundridge bridleway 20 |
Continue heading E on Thundridge bridleway 20 for 300m to a junction (location -
https://w3w.co/windy.goes.coach), see image below.
 |
| Keep right on Wareside bridleway 51 |
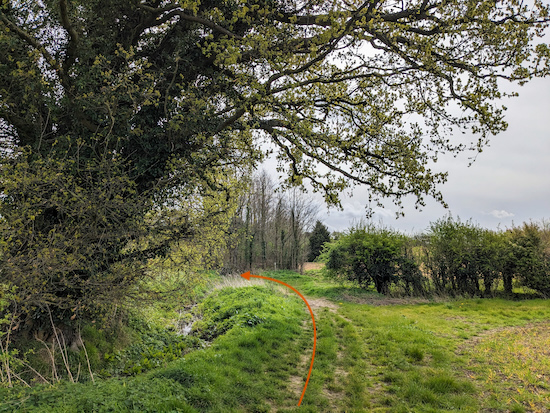
5: Keep right on Wareside bridleway 51 then head SE for 510m to a T-junction (location -
https://w3w.co/mole.remove.loser), see image below.
 |
| Turn left then head NE on Wareside bridleway 50 |
6: Turn left on Wareside bridleway 50 then head NE for 420m until you reach woodland (location -
https://w3w.co/civil.oasis.diner) where you cross a parish boundary at which point the track you are on becomes Thundridge bridleway 19, see image below.
 |
Continue heading NE, now on Thundridge bridleway 19
|
7: Continue heading NE, now on Thundridge bridleway 19, for 385m until you reach a junction just before the end of the woodland (location -
https://w3w.co/gifted.bother.tall), see image below.
.jpeg) |
| Keep right on Thundridge bridleway 12 |
8: Ignore the bridleway on the left but keep right, still heading ENE on Thundridge bridleway 12, with the woodland on your left for 60m until you leave the woodland and reach an arable field (location -
https://w3w.co/forced.tune.stem).
Continue across the field heading ENE for 400m until you reach a junction (location -
https://w3w.co/leader.surely.itself), see image below.
 |
| Continue heading ENE then NE, still on Thundridge bridleway 12 |
9: Continue heading ENE then NE, still on Thundridge bridleway 12, for 610m until you reach a junction (location -
https://w3w.co/whips.tribes.period), see image below.
 |
| Turn right on Thundridge restricted byway 57 |
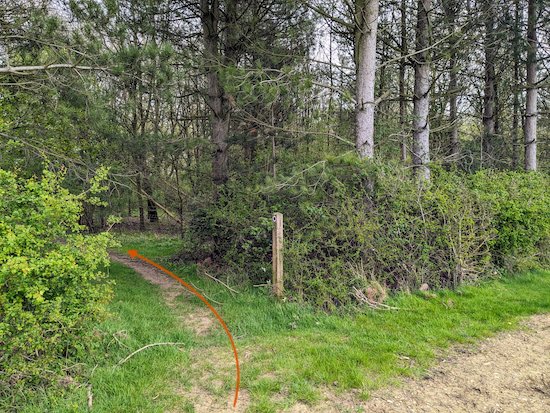
10: Turn right on Thundridge
restricted byway 57 then head SE for 290m where the byway turns left then enters woodland (location -
https://w3w.co/healthier.pizza.chill), see image below.
 |
| Turn left, still on Thundridge restricted byway 57 |
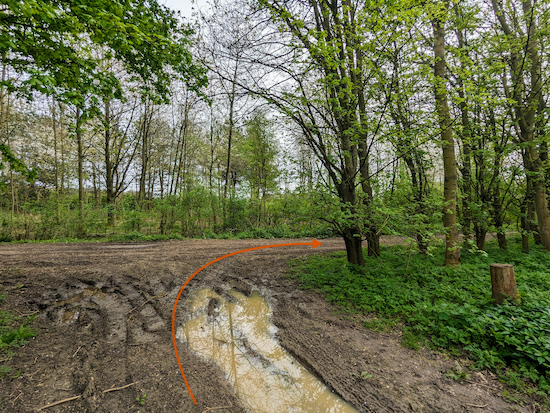
11: Turn left, still on Thundridge restricted byway 57, then head NE for 60m to a junction (location -
https://w3w.co/small.fantastic.secret), see image below.
 |
| Keep right at the junction, still on Thundridge restricted byway 57 |
12: Keep right at the junction, still on Thundridge restricted byway 57, then head SE for 95m until you leave the woodland (location -
https://w3w.co/skin.meal.fades), see image below.
 |
| Follow Thundridge restricted byway 57 with the hedgerow on the right |
Continue, still on Thundridge restricted byway 57, with the hedgerow on the right, for 130m until you enter woodland (location -
https://w3w.co/plot.encounter.composers).
13: Follow Thundridge restricted byway 57 through the woodland for 150m until you reach a field (location -
https://w3w.co/lakes.forks.even), see image below.
 |
| Leave the woodland, turn left, then head E |
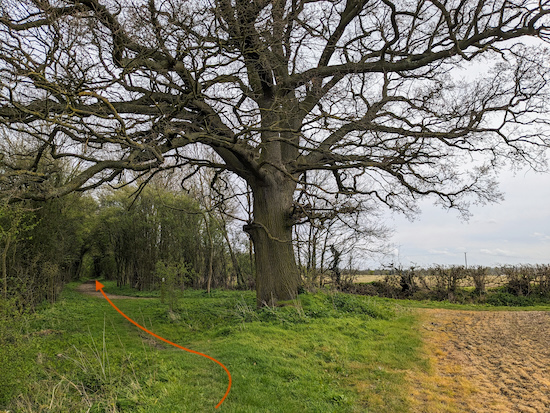
14: Leave the woodland, turn left, then head E for 110m, now on Wareside restricted byway 80, until you reach a junction (location -
https://w3w.co/stow.paper.falls), see image below.
 |
| Turn left on Wareside restricted byway 80 |
15: Turn left, still on Wareside restricted byway 80 then head NE for 105m to a junction (location -
https://w3w.co/dish.cloth.gown), see image below.
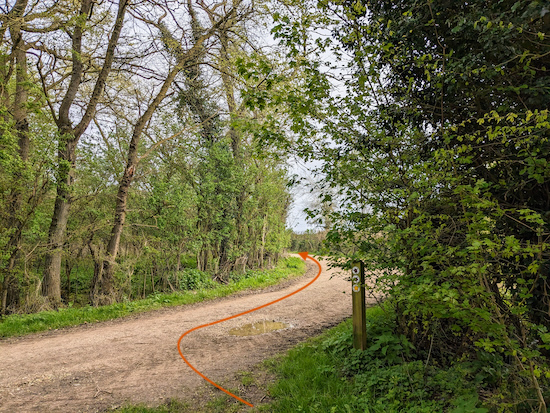 |
| Keep right at the junction, still Wareside restricted byway 80 |
16: Keep right at the junction, still Wareside restricted byway 80, then head NE for 45m to a junction (location -
https://w3w.co/snacks.lasts.heads), see image below.
 |
| Turn left on Thundridge restricted byway 58 |
Turn left at the junction (see the orange arrow on the image above) then head NE, now on Thundridge restricted byway 58. Continue for 360m until you pass through woodland and reach a bridleway on the left (location -
https://w3w.co/charmingly.lifted.swift), see image below.
 |
| Turn left on Thundridge bridleway 4 |
17: Turn left on Thundridge bridleway 4 then head NW for 385m then WNW for 195m through lovely woodland continuing until you reach a junction at the edge of the woodland (location -
https://w3w.co/skin.ranch.mock), see image below.
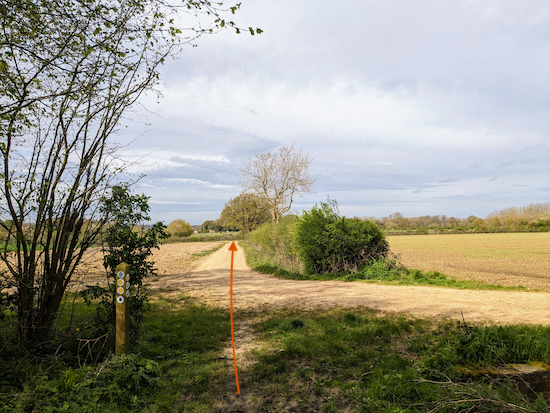 |
| Continue across the junction, still on Thundridge bridleway 4 |
18: Continue across the junction, still on Thundridge bridleway 4 and heading WNW, with the hedgerow on your right and field on the left, for 270m until you reach a junction (location -
https://w3w.co/tiny.inch.light), see image below.
 |
| Turn right at the junction |
19: Turn right at the junction (see orange arrow on the image above), head NNW for 20m to another junction (location -
https://w3w.co/never.plots.damage), see image below.
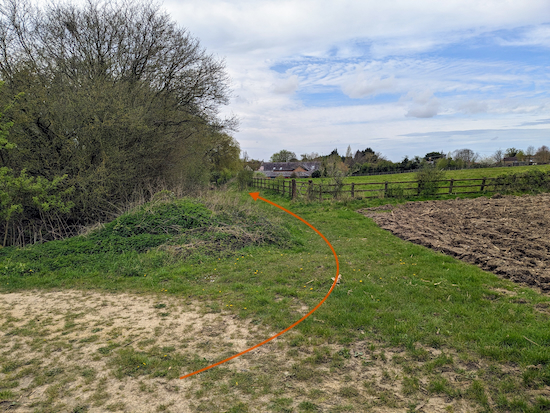 |
| Turn left on Thundridge bridleway 9 |
Turn left on Thundridge bridleway 9 then head SW then W for 165m until you reach a junction to the left of a large house (location -
https://w3w.co/puzzle.fled.lowest), see image below.
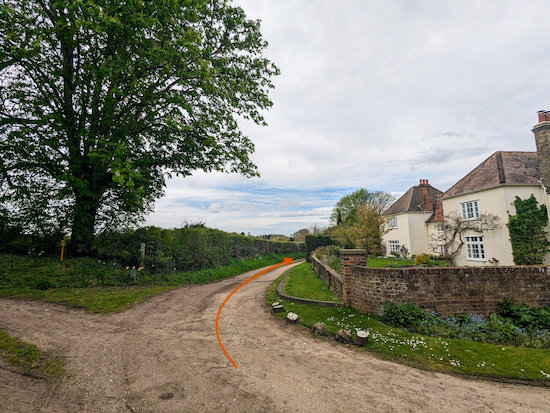 |
| Keep right at the junction, still on Thundridge bridleway 9 |
20: Keep right at the junction, still on Thundridge bridleway 9, then head W for 125m until you reach Cold Christmas Lane (location -
https://w3w.co/using.barks.entire).
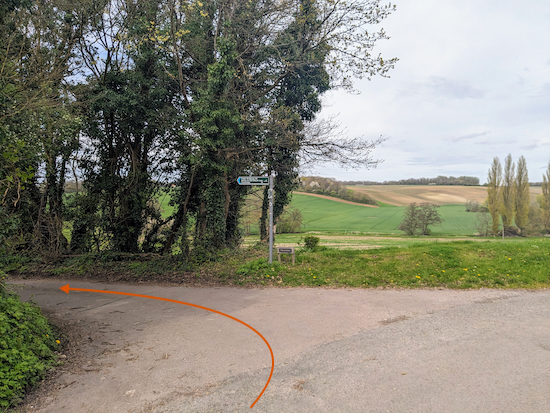
21: Turn right on Cold Christmas Lane then head N for 120m until you reach a bridleway on the left (location -
https://w3w.co/bugs.games.round), see image below.
 |
| Turn left on Thundridge bridleway 24 |
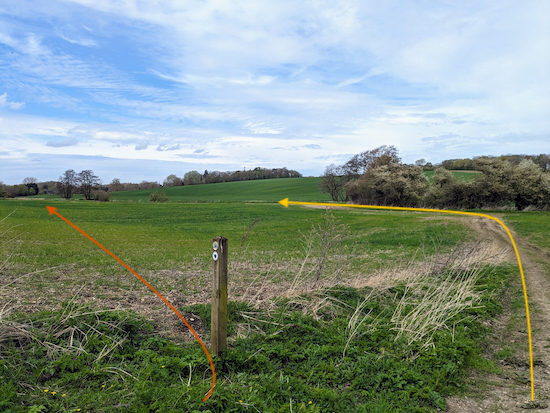
22: Turn left on Thundridge bridleway 24 then follow the track downhill in a north-westerly direction for 160m until you reach a bridleway sign on the left (location -
https://w3w.co/sounds.vouch.chats), see image below.
 |
| Turn left, still on Thundridge bridleway 24 |
23: Turn left, still on Thundridge bridleway 24, then head W across an arable field (see orange arrow on the image above) for 240m until you reach a footbridge (location -
https://w3w.co/gets.solo.forms) which you cross then continue heading W, still on Thundridge bridleway 24, for 50m until you reach the River Rib (location -
https://w3w.co/suffice.deed.shakes).
* When we did this walk on 8 April 2024 this section of Thundridge bridleway 24 had not been reinstated after cultivating. If you are worried about trampling young plants there is an unofficial alternative to crossing this field which is clearly used by many (based on the boot prints). That route is marked in yellow on the image above. I have included a map below to show the route to avoid damaging the crop. (I have reported the fact that the bridleway hasn't been reinstated to Hertfordshire County Council's ROW team).
 |
| The alternative, unofficial, route in yellow |
24: Head WSW on Thundridge bridleway 24 for 340m with the River Rib on your right until you reach a junction with a bridge on the right (location -
https://w3w.co/lanes.affair.spirit), see image below.
 |
| Continue in a westerly direction, still on Thundridge bridleway 24 |
25: Continue, still on Thundridge bridleway 24 and still heading in a westerly direction with the River Rib on your right, for 575m until you reach
the ruins of Thundridge old church (location -
https://w3w.co/race.plays.jacket), see image below. St Mary and All Saints, Old Church Lane, Thundridge was demolished in 1853; only the
Grade II* listed tower remains.
 |
| The remains of the church of St Mary and All Saints |
26: Continue heading in a westerly direction, still on Thundridge bridleway 24, for 530m until you reach a junction (location -
https://w3w.co/losses.nails.monkey), see image below.
 |
| Turn right at the junction on Thundridge bridleway 54 |
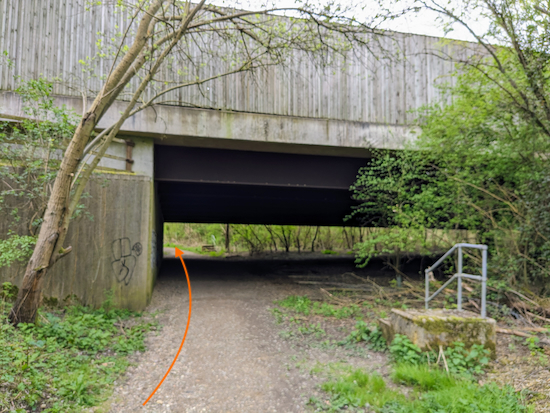
27: Turn right at the junction on Thundridge bridleway 54. (
You will notice that the sign is pointing in the wrong direction on the image above. This has been reported to Hertfordshire County Council's Rights of Way team).
Follow Thundridge bridleway 54 north then west for 75m to an underpass beneath the A10, location -
https://w3w.co/luxury.eggs.giant), see image below.
 |
| Continue under the A10, and still on Thundridge bridleway 54 |
Continue under the A10, and still on Thundridge bridleway 54, for 90m until you reach a footpath on the left (location -
https://w3w.co/rests.claims.natively), see image below.
 |
| Turn left on Thundridge footpath 25 |
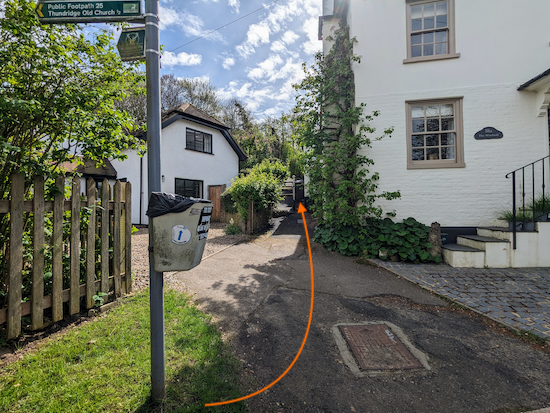
28: Turn left on Thundridge footpath 25 then follow it W for 260m until you reach a footpath on the left just before Ermine Street (location -
https://w3w.co/only.tulip.sleeps), see image below.
* At this point, if you need refreshments, you could turn right on Ermine Street then head N for 170m to Ermines Cafe (location - https://w3w.co/flames.hatch.gazed), or carry on heading NW for another 160m over the River Rib and into Wadesmill to visit The Feathers pub/restaurant (location - https://w3w.co/thus.exchanges.rare)
 |
| Turn left on Thundridge footpath 21A |
29: Turn left on Thundridge footpath 21A then head S for 255m until you reach Woodlands Road (location -
https://w3w.co/radar.monday.dice).
30: Continue heading S along Woodlands Road for 150m until you reach Cold Christmas Lane at point 2 in the walk (location -
https://w3w.co/radar.monday.dice), see image below.
31: Turn right on Cold Christmas Lane then head back to the staring point.
If you want to discuss this walk there is a comment box below. Alternative you could join our friendly
Hertfordshire Walker Facebook group and post comments and photographs there.
Interactive Map


.jpeg)


.jpeg)


No comments:
Post a Comment