Site Information

Welcome to Hertfordshire Walker

CPRE Hertfordshire double award winner 2022

Showing posts with label 25m-50m. Show all posts

Walk 161: Sawbridgeworth South Linear

4.5 miles (7.3 km) with 39m of total ascent


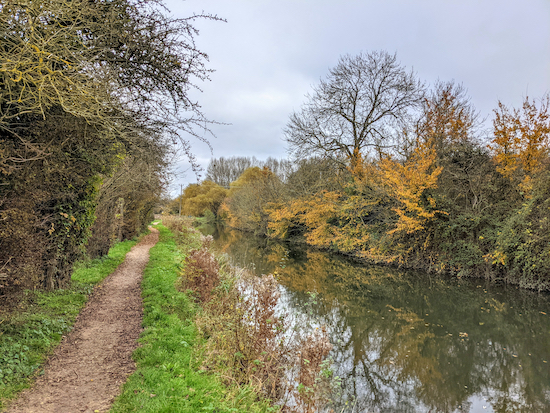
The River Stort (Navigation) along Walk 161
 
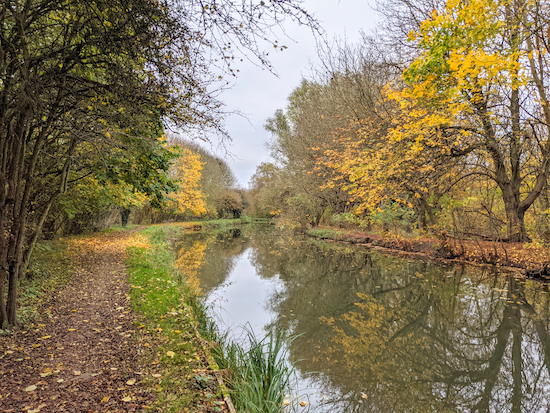
This is a linear walk from Harlow to Sawbridgeworth, mostly following the towpath alongside the River Stort (Navigation) towpath. There are regular train services connecting the two towns. The first part of the walk is alongside industrial units, but you are soon into open countryside. Birdwatchers should take their binoculars. The walk starts in Essex, close to the Hertfordshire border, then dips in and out of both counties before ending in Hertfordshire.

Directions


Map for Walk 161: Sawbridgeworth South Linear Created on Map Hub by Hertfordshire Walker Elements © Thunderforest © OpenStreetMap contributors There is an interactive map below these directions
Map for Walk 161: Sawbridgeworth South Linear
Created on Map Hub by Hertfordshire Walker
Elements © Thunderforest © OpenStreetMap contributors

There is an interactive map below these directions
Those with GPS devices can download GPX or KML files for this walk. We've added What3Words location references for those who use that system. If you print these walks you might want to use the green PrintFriendly icon at the bottom of these directions to delete elements such as photographs.

By train: Those travelling to this walk by train should turn right on leaving Harlow Town station (location - https://w3w.co/film.acute.grass) then head SW along Station Approach for 240m until you reach a roundabout and the A414 on the right (location - https://w3w.co/raced.undulation.assets). Turn right then head NW alongside the A414 for 250m until you reach Burnt Mill Lane on the right (location - https://w3w.co/remind.lived.cake). Turn right down Burnt Mill Lane then head E for 150m until you reach a junction (location - https://w3w.co/effort.print.piles). Keep left at the junction, still on Burnt Mill Lane, then head NE for 45m until you reach a bridge (location - https://w3w.co/glory.spoon.carbon). Here you turn right on the towpath alongside Burnt Mill Lock. This is the start of the walk.

The cut-through from the Moorhen car park to Burnt Mill Lane
By car: The management at The Moorhen pub/restaurant told us that it's okay to use their car park if we were returning for refreshments after the walk, which we were. If you park here it's probably best call them first to check this is still the case (01279-423066). From the car park take the cut through in the NW corner (location - https://w3w.co/basis.cage.ranked), see image above, then turn left on Burnt Mill Lane and head SW for 15m crossing the River Stort, then take the towpath on the left, immediately after the bridge (location - https://w3w.co/sector.robots.values). This is the start of the walk.

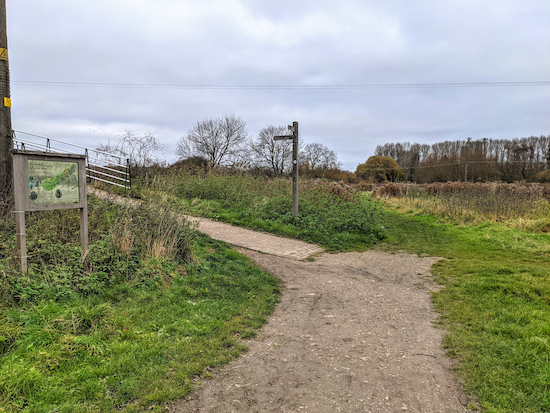
The Harcamlow Way at the start of the walk
1: From the towpath mentioned above head ESE then ENE passing the lock and crossing a bridge before reaching a metal gate, see image above (location - https://w3w.co/escape.visa.armed). This part of the towpath is also the Harcamlow Way which you follow NE for 850m until you reach the Harlow Marsh Nature Reserve (location - https://w3w.co/drew.wonderfully.about) and a footbridge on the left, see image below.

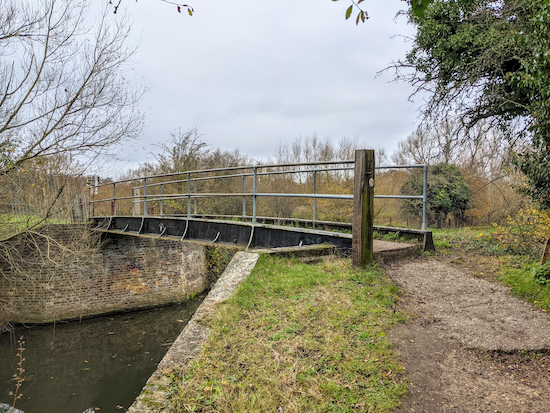
Turn left on Eastwick and Gilstone footpath 33 then cross the River Stort
2: Turn left on Eastwick and Gilstone footpath 33, cross the River Stort, then turn immediately right and follow the towpath on the NW side of the river. This is still Eastwick and Gilstone footpath 33 which you follow NE for 380m to a footpath junction (location - https://w3w.co/level.sober.hint).

The towpath where it becomes Sawbridgeworth footpath 43
3: Keep to the right at the junction, now on Eastwick and Gilstone footpath 35 which you follow E for 300m until the towpath you are on becomes Sawbridgeworth footpath 40 (location - https://w3w.co/inform.bake.rocky), and continues heading E for another 200m until the towpath becomes Sawbridgeworth footpath 43 (location - https://w3w.co/spike.palace.middle).

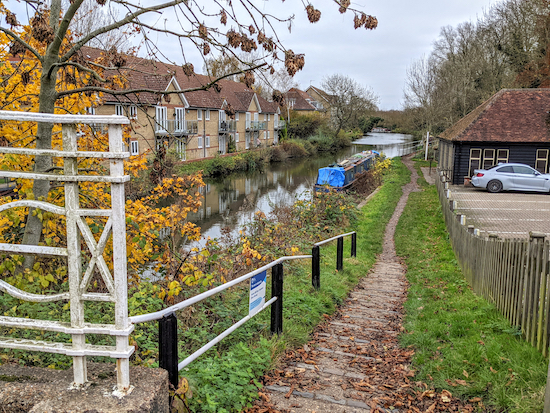
Keep on the left side of the River Stort at the lock
4: Continue along the towpath (Sawbridgeworth footpath 43) heading E then NE for 1.2km until you reach a footpath junction (location - https://w3w.co/fuels.works.delay).

Cross the bridge at Cambridge Road then take the towpath on the left
5: Turn right on Sawbridgeworth footpath 19, which is still the towpath, and continue heading NE and E for 490m until you reach Cambridge Road (location - https://w3w.co/lasts.drain.spun). Leave the towpath, turn right on Cambridge Road, and cross the River Stort looking out for a path on the left leading down to the towpath (location - https://w3w.co/crowned.juices.emerge).

* At this point you could visit The Harlow Mill pub restaurant on the S bank of the River Stort (location - https://w3w.co/traded.proper.maker).

6: Turn left on the towpath, which is also Harlow District footpath 31, and, with the River Stort now on your left, head E for 1km until the towpath becomes Sheering footpath 23 (location - https://w3w.co/skins.stop.square).

7: Continues heading NE and N along the towpath, still on Sheering footpath 23, for another 1km until you reach a footpath junction (location - https://w3w.co/lights.shapes.keen).

Cross the River Stort on the footbridge then turn right on the towpath
8: You are now in Hertfordshire. Turn left on Sawbridgeworth footpath 39, cross the River Stort, then turn immediately right on the other side to follow the towpath, still Sawbridgeworth footpath 39, with the River Stort on your right, for 1.5km until you reach Station Road, Sawbridgeworth (location - https://w3w.co/needed.clever.decent).

You will notice some old buildings on the right just before you leave the towpath. These are the maltings. The history of Hertfordshire's hop industry, and how the River Stort was used to transport the hops to the breweries in London, is fascinating. You can read about it on the Bishop's Stortford Town Council's website.

9: Turn right on Station Road then walk NE for 180m to Sawbridgeworth station (location - https://w3w.co/loves.agents.major), where you can catch a train back to Harlow Town station.
* If you arrive at point 9 and are too early for your train home, or if you just want to explore the historic town of Sawbridgeworth and have a drink, turn left on Station Road and you will find six pubs, the first, The George IV, just 440m NW along Station Road.
When you arrive back at Harlow Town station and if you have parked at The Moorhen pub/restaurant, then follow the 'By Train' steps set out at the top of these directions to return to the car park. The Dusty Miller pub/restaurant is 520m from the starting point.

Interactive map


>

Walk 140: Ashwell West Loop

6.9 miles (11 km) with 47m of total ascent


Ashwell restricted byway 2
The bridleway heading towards Arbury Banks Hill Fort
This is an excellent walk for those who want wide open views across unspoilt countryside. The walk passes by or close to four pubs, and you will walk alongside the site of Arbury Banks, a series of iron-age hillforts. There is little shelter along the way, so this might not be great in bright sunlight, heavy rain, or howling gales.

Directions


Map for Walk 140: Ashwell West Loop Created on Map Hub by Hertfordshire Walker Elements © Thunderforest © OpenStreetMap contributors There is an interactive map below these directions
Map for Walk 140: Ashwell West Loop
Created on Map Hub by Hertfordshire Walker
Elements © Thunderforest © OpenStreetMap contributors

There is an interactive map below these directions
Those who follow our walks using GPS on their mobile devices can download GPX or KML files for this walk. We've added What3Words location references for those who use that navigation system. If you print these walks you might want to use the green PrintFriendly icon at the bottom of these directions to delete elements you don't need.

1: This walk starts outside the Bushel And Strike pub on Mill Street opposite the church of St Mary. Take the footpath that heads W along the N side of the pub (location - https://w3w.co/expensive.decreased.shuttled). This is Ashwell footpath 26, which heads W through the pub car park for 60m until you reach Gardiners Lane (location - https://w3w.co/operation.thunder.grapevine).

Turn right on Gardiners Lane and head NW for 120m until the lane bends to the left (location - https://w3w.co/birds.keys.windpipe) and then heads WNW for 100m before reaching a fork in the road (location - https://w3w.co/reclining.helps.skewing). Turn right at the fork and head NNW for 220m until you reach a farm at which point the lane swings to the right and heads NNE, NNW, then NNE again for 230m before reaching a footpath on the left (location - https://w3w.co/tangling.dash.repeat).

2: Turn left on Ashwell footpath 8 and head NW for 300m, first across a field and then alongside woodland on your left. Continue until you reach the end of the woodland (location - https://w3w.co/crunching.forget.hook) at which point Ashwell footpath 8 heads straight and slightly to the right across a field in a NW direction (see image below) for 480m until it reaches Common Lane (location - https://w3w.co/slimming.medium.decisive).

Your path heads slightly to the right in a NW direction - point 2
3: Turn left on Common Lane and follow it SW for 400m to Bluegates Farm where the lane bends left then right before reaching a lane on your left (location - https://w3w.co/driveway.kidney.eminent). Ignore the lane on your left and continue heading SW for 260m until you reach a left-hand bend (location - https://w3w.co/cavalier.bolt.craft).

Common Lane heading SW towards Bluegates Farm
4: At the bend take Ashwell bridleway 20 on your right and head WSW for 280m before reaching a junction (location - https://w3w.co/limes.soothing.distilled) at Ashwell End Farm.

Ashwell bridleway 20 - point 4
Turn left on Ashwell bridleway 30, which at this point is a metalled track, and head SSE for 35m before you reach a footpath on your right (location - https://w3w.co/handfuls.bloodshot.sketch).

5: Turn right on Ashwell footpath 20 and head WSW for 170m looking out for a footpath on your right which is hidden in the hedgerow (location - https://w3w.co/commenced.madder.thrillers). Turn right on this path, Ashwell footpath 20, cross a footbridge, then head NW for 95m until you reach a second footbridge (location - https://w3w.co/stretcher.exhaling.sample).
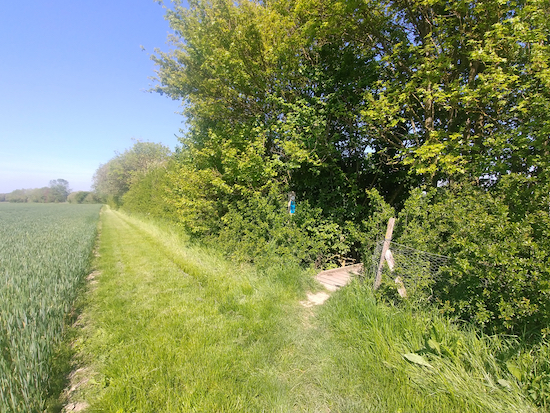
Ashwell footpath 20 - point 5
Ashwell footpath 20 to the right - point 5
At this point your path becomes Hinxworth footpath 2 and continues NW across a field for 600m until it reaches a junction in the track with a farm on you left (location - https://w3w.co/grips.divorcing.ringside).

6: Cross the track and continue heading WNW, still on Hinxworth footpath 2 which is also known as Arnolds Lane along this stretch, for 620m until you reach a footpath junction (location - https://w3w.co/access.trailing.started). Ignore the path going off to your left and continue heading WNW along Arnolds Lane for 270m until you reach Chapel Street on your left (location - https://w3w.co/organs.jets.fabric).

7: Turn left on Chapel Street and head SW for 240m until you reach Ashwell Road in Hinxworth (location - https://w3w.co/keener.employer.expiring). The Three Horseshoes pub will be on the corner opposite and to your left. Cross Ashwell Road and take the footpath on the opposite side. This is Hinxworth footpath 1 which you follow SW, SE, then SW again for 270m until the path bends to the left (location - https://w3w.co/nods.seeing.grandson).

8: Turn left, still on Hinxworth footpath 1, and head ESE for 200m until you reach New Inn Road (location - https://w3w.co/almost.loaning.renting). Turn right on New Inn Road and head SE for 70m looking out for a track and footpath on the left.

9: Turn left on Hinxworth footpath 8 (location - https://w3w.co/explains.important.voted) and head ESE through some business units for 270m until you reach a footpath junction (location - https://w3w.co/condense.stated.adding).

10: Turn right on Hinxworth footpath 7 and head S then SSE for 520m until you reach a junction (location - https://w3w.co/general.umbrellas.backlog).

Hinxworth footpath 7 - point 10
11: Turn left on Hinxworth bridleway 11, which later becomes becomes Ashwell bridleway 29, and follow it SE for 1.8km ignoring tracks on your right and left until you reach Ashwell Road (location - https://w3w.co/grandson.stickler.overcomes). This stretch has some excellent views across rolling countryside.

12: Turn left on Ashwell Road and head NW for 180m until you reach a track on your right (location - https://w3w.co/chromatic.table.summaries).

* This stretch of road can be busy and it looks like walkers have chosen to tread a route along the edge of the field on the W side of the road to avoid the traffic.

Turn right on Ashwell restricted byway 3 and head SE for 470m passing a pig farm before reaching a junction (location - https://w3w.co/navy.sunflower.steady).

13: Turn left on Ashwell restricted byway 2 and head NE for 1.3km until you reach a junction (location - https://w3w.co/deferring.eventful.expressed).

* On your left after 900m along this stretch you will pass Arbury Banks Hill Fort where there is an information board about the former settlement (location - https://w3w.co/witless.dance.slogged).

The sign at Arbury Banks Hill Fort
 

The sign at Arbury Banks Hill Fort
 
14: At this junction take the left turn behind the hedgerow, not the one in front. This is Ashwell BOAT 31 (byway open to all traffic), which is also known as Partridge Hill. Follow it NNW for 280m to a junction (location - https://w3w.co/trending.coping.petition).

15: Turn right on Ashwell BOAT 15, which is also known as Ashwell Street, and head ENE for 500m until you reach Bear Lane (location - https://w3w.co/dynamics.singles.stems).

16: Turn left on Bear Lane and head NNW for 250m back to Ashwell village centre and the starting point.

There are three pubs in Ashwell village, The Three Tuns (location - https://w3w.co/magnum.image.ironic), the Rose & Crown (location - https://w3w.co/reissued.informal.screening), and Bushel And Strike (location - https://w3w.co/ferried.hairpin.flitting) mentioned at the start of the

Thanks to our good friend Bernard for recommending that we add a walk in this area.

Interactive map


Walk 111: Gustard Wood East Loop

4.3 miles (7 km) with 45m of total ascent


The bridleway between points 1 and 2 below Image by Hertfordshire Walker released via Creative Commons BY-NC-SA 4.0
The bridleway between points 1 and 2
A figure of eight walk from Ayot St Lawrence to Gustard Wood and back crossing parkland, farmland and woodland. The route is mainly flat with good paths along the way. There is a pub at the start and finish and one at the halfway point. The route passes two historic churches and Shaw's Corner, the home of the late George Bernard Shaw.

Directions


Map for Walk 111: Gustard Wood E Loop Created on Map Hub by Hertfordshire Walker Elements © Thunderforest © OpenStreetMap contributors There is an interactive map below the directions
Map for Walk 111: Gustard Wood East Loop
Created on Map Hub by Hertfordshire Walker
Elements © Thunderforest © OpenStreetMap contributors

There is an interactive map below the directions
Those with GPS devices can download GPX or KML files for this walk. We've added What3Words references for those who use that system. If you print these walks you might want to use the green PrintFriendly icon at the bottom of these directions to delete elements.

1: Park along the Hill Farm Lane outside The Brocket Arms (location - https://w3w.co/shock.organ.emerge). As you face the Brocket Arms walk to your left and head NE along the lane until you reach the bend (location - https://w3w.co/influencing.comb.churn).

The Brocket Arms
The Brocket Arms
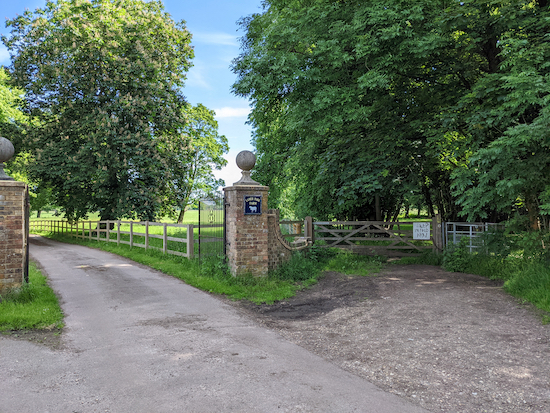
Turn left and walk down a metalled track and through two brick pillars. This is Ayot St Lawrence bridleway 10 which you follow N for 570m. You will pass through some metal gates and a sign reading 'Manor House' before continuing down a gravel track with Ayot House on your left. Continue until you reach a junction (location - https://w3w.co/serve.tried.urgent).

2: Turn left and head SW on Codicote footpath 37 with the hedgerow on the left and the field on the right for 410m until you reach a gate in the corner of a field (location - https://w3w.co/zips.pill.meant).

3: Go through the gate and head SSW and diagonally across the field on Ayot St Lawrence footpath 5 for 300m towards a gate leading to the new Ayot St Lawrence Church (location - https://w3w.co/beans.given.orbit).

Take the footpath on the left, Kimpton footpath 11 to reach Kimpton footpath 14 Image by Hertfordshire Walker released via Creative Commons BY-NC-SA 4.0
Take the footpath on the left Kimpton footpath 11
4: Don't go through the gate into the churchyard, but instead keep right on Kimpton footpath 11 heading NW for 70m, with the hedgerow on the left and field on the right,  looking out for a footpath on the left (location - https://w3w.co/such.send.spit). Take this path, Kimpton footpath 14, then head W for 410m until you reach Bibbs Hall Lane (location - https://w3w.co/tooth.paths.robots).

5: Turn left on the lane and head SSE for 260m until you reach a track on the right at the point where the lane bends to the left (location - https://w3w.co/pace.shack.looks).

6: Take this track then head SSW for 130m until you reach a footpath crossing (location - https://w3w.co/leader.trials.stand).

7: Turn right on Wheathampstead footpath 36 then head W for 1.4km ignoring paths off to your right and left. This footpath eventually becomes Kimpton footpath 12.

Wheathampstead footpath 36 heading W (point 7)
Wheathampstead footpath 36 heading W - point 7
8: When you reach the B651 Ballslough Hill (location - https://w3w.co/flap.coffee.always) turn left walk past the Cross Keys pub on your right (location - https://w3w.co/alien.smooth.paint) and continue past the pub car park and take the bridleway on the left, Wheathampstead bridleway 101 (location - https://w3w.co/memory.topped.spin). Head SSE through Gustard Wood.

9: When you reach the B651 Lamer Lane (location - https://w3w.co/fishery.snail.sobs) turn left and then turn left again down a lane (location - https://w3w.co/hill.badge.toxic) which, after the last house on your right joins up with Wheathampstead footpath 37 and heads ENE and uphill along a metalled lane for 600m until the track bends to the left. (location - https://w3w.co/lanes.month.theme).

10: When you reach the bend turn left, still on the metalled lane, and head N for 180m on Wheathampstead footpath 41 until you reach the gates of Lamer Park Farm (location - https://w3w.co/critic.harsh.pills), see image below.

Take the footpath to the right of the wooden gate
Take the footpath to the right of the wooden gate - point 10
Turn right before the gates on Wheathampstead footpath 37 then head NE for 730m to the junction at point 7 above (location - https://w3w.co/pouch.flute.closes).

Turn right on Kimpton footpath 13 and head ENE for 210m before reaching a footpath junction (location - https://w3w.co/bricks.powder.filed) where you continue straight taking Wheathampstead footpath 99 and head ESE for 350m until you reach Bride Hall Lane (location - https://w3w.co/trying.tile.reef).

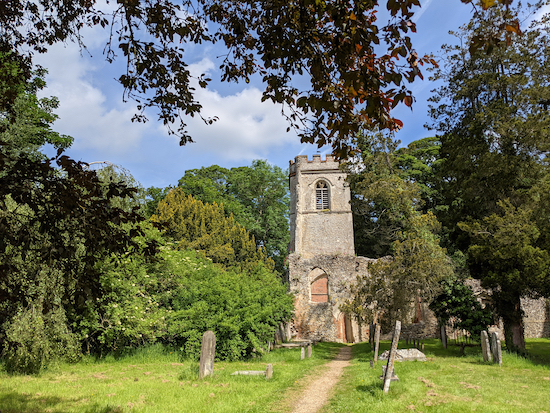
11: Turn left on the lane and head NNE for 280m passing Shaw's Corner on the left (location - https://w3w.co/gent.going.bars) before the lane bends to the right, passes Ayot St Lawrence old church (location - https://w3w.co/grapes.basket.flips), see image below, and continues for 120m heading NE back to the start point.

Ayot St Lawrence old church
Ayot St Lawrence old church - point 11


Interactive map


Walk 101: Colney Heath Loop

2.4 miles (3.9 km) with 32m total ascent


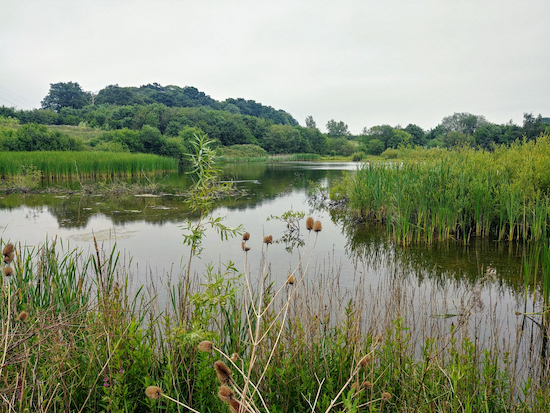
Willows Lakes
Willows Lakes
This is a short walk across Colney Heath, along the River Colne, and alongside Willows Lakes (renamed Albans Lakes in 2018), where anyone who enjoys bird-watching could be in for a treat depending on the season, particularly between points 5 and 6. There is free parking at the start and finish, and a pub, The Crooked Billet, in Colney Heath, a short diversion from the route. This walk is a shorter version of another walk on this site, Colney Heath South Loop.

Directions


Map for Walk 101: Colney Heath Loop Created on Map Hub by Hertfordshire Walker Elements © Thunderforest © OpenStreetMap contributors There is an interactive map below the directions
Map for Walk 101: Colney Heath Loop
Created on Map Hub by Hertfordshire Walker
Elements © Thunderforest © OpenStreetMap contributors

There is an interactive map below the directions
Those with GPS devices can download GPX or KML files for this walk. We've added What3Words location references for those who use that navigation system. If you print these walks you might want to use the green PrintFriendly icon at the bottom of these directions to delete elements you don't need.

Park along the track west of Coursers Road to the south of Colney Heath, (location - https://w3w.co/cabin.spoon.dozen). Please keep to the public rights of way on this walk. We have included a map at the foot of this page showing the public rights of way around Willows Lakes in green and the paths reserved for those fishing the lakes in red.

1: Take the footpath that leads across the heath but turn left after 15m on Colney Heath footpath 36, following it as it bends SW and then turns NW through the woods for 280m until you meet a footpath junction (location - https://w3w.co/baking.quick.jars). This is where Colney Heath footpath 36 heads SW across the field. You will return on this path, but for now, ignore it and continue NW through the woods for another 100m until you reach the open heath (location - https://w3w.co/agree.bricks.improving). You are now on Colney Heath footpath 35. Follow this path W for another 440m until you meet Church Lane (location - https://w3w.co/social.pose.awake).

2: Turn left on Church Lane for 20m before taking the footpath on your right (location - https://w3w.co/lazy.fines.offer). This is Ridge footpath 2, which passes a model railway on the left run by the North London Society of Model Engineers. This track is also the Watling Chase Timberland Trail. Follow the footpath SW for 550m until you reach a track (location - https://w3w.co/gent.adults.sums).

3: Cross the track and then cross a bridge over a conveyor belt (location - https://w3w.co/gear.socket.grant) carrying sand from a nearby quarry before continuing along Ridge footpath 2 for another 100m until you come to a junction with Ridge bridleway 6 (location - https://w3w.co/raced.tubes.cotton). Turn left and follow the bridleway SW for 400m looking out for a bridleway on your left (location - https://w3w.co/tester.nature.museum).

Heading SW on Ridge footpath 2 Image by Hertfordshire Walker released via Creative Commons BY-NC-SA 4.0
Head SW on Ridge footpath 2

The junction of Ridge bridleway 6 and Ridge footpath 2 mentioned in point 3 Image by Hertfordshire Walker released via Creative Commons BY-NC-SA 4.0
The junction of Ridge bridleway 6 and Ridge footpath 2
4: Unusually for a bridleway, this one involves wooden steps crossing over the conveyor belt from the quarry. Take this bridleway, still Ridge bridleway 6, and head SE for 400m.

* Once over the bridge you could take a 680m circular detour to the south through Garden Wood if you want to extend the walk. The detour brings your back to point 5.

The wooden steps on Ridge bridleway 6
The conveyor belt from the quarry mentioned in point 4 above Image by Hertfordshire Walker released via Creative Commons BY-NC-SA 4.0
The conveyor belt from the quarry
5: When you reach the next crossing (location - https://w3w.co/translated.stick.goes), turn left and head NE for 250m on Ridge footpath 4. This is a really nice path that goes between two lakes and is an ideal spot for birdwatchers.

Ridge bridleway 6 between the lakes as mentioned in point 5 above Image by Hertfordshire Walker released via Creative Commons BY-NC-SA 4.0
Ridge bridleway 6 between the lakes
6: When you reach the next footpath junction (location - https://w3w.co/tone.avoid.brings) there is a diversion that avoids crossing the field occupied by horses. The farmer has put a sign up here warning that dogs are loose in the field. Rather than take a risk we chose the diversion, Ridge footpath 47. Turn left on this path, to the left of the field, and follow it as it weaves its way around the field for 320m first NE, then NW, then NE, then NW, and eventually SE before it rejoins Ridge footpath 4 (location - https://w3w.co/valve.retail.lied).

Take the diversion on the left Ridge footpath 47 mentioned in point 6 above Image by Hertfordshire Walker released via Creative Commons BY-NC-SA 4.0
Take the diversion on the left, Ridge footpath 47
7: Turn left on Ridge footpath 4 and head NE for 530m until you reach a footbridge (location - https://w3w.co/save.launch.tree).

The footbridge mentioned in points 7 and 8 Image by Hertfordshire Walker released via Creative Commons BY-NC-SA 4.0
The footbridge mentioned in points 7 and 8
8: Cross the footbridge and continue heading NW for another 170m on Colney Heath footpath 36 until you reach the woods south of Colney Heath (location - https://w3w.co/highs.fell.hopes).

9: Continue heading NE on Colney Heath footpath 36 for 70m before branching off to the right and heading W back to the starting point.

Rights of way and private paths


Public rights of way in green, private fishing paths in red
The green markers show two land-bridge across the lakes

Click here or on image for larger version
Created on Map Hub by Hertfordshire Walker
Elements © Thunderforest © OpenStreetMap contributors

Interactive map


Walk 99: Woodside Loop

3.5 miles (5.6 km) with 45m total ascent


Green Street looking back towards point 10 Image by Hertfordshire Walker released via Creative Commons BY-NC-SA 4.0
Green Street looking back towards point 10
This is an extension of the shorter Wildhill Loop, which is walk six in this series. We’ve added it because it has been one of our regular walks during the coronavirus lockdown of 2020, when we wanted a walk that was quiet and which we could enjoy without meeting too many people. It starts and finishes at The Woodman, Wildhill. The walk includes a section called Green Street, which is a lovely 2km stretch of wooded byway.

Directions


Map for Walk 99: Woodside Loop  Created on Map Hub by Hertfordshire Walker  Elements © Thunderforest © OpenStreetMap contributors  Note: There is a larger, more-detailed map embedded at the end of these directions
Map for Walk 99: Woodside Loop
Created on Map Hub by Hertfordshire Walker
Elements © Thunderforest © OpenStreetMap contributors

There is an interactive map below the directions
Those with GPS devices can download GPX or KML files for this walk. We've added What3Words location references for those who use that navigation system. If you print these walks you might want to use the green PrintFriendly icon at the bottom of these directions to delete elements you don't need.

1: Go through the gate in the SW corner of The Woodman car park (location - https://w3w.co/newly.wiser.open) and follow the footpath, Hatfield footpath 84, for 300m as it heads SSW. Cross a wooden bridge, go through another gate, and follow the path until it crosses another wooden footbridge.

2: After the bridge go through a gate on your left and then turn right (location - https://w3w.co/tribune.author.over). Head WSW then SW for 200m, with the field on your left and the hedgerow on your right until you reach a gap in the hedge on the right (location - https://w3w.co/slam.watch.zones). Look out for buzzards and red kites over your head.

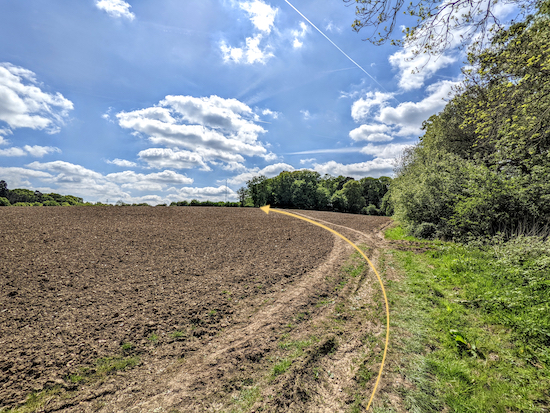
Head uphill and SW with the hedgerow on the right and the field on the left
3: Go through the gap, cross a small stream that runs through a pipe underfoot, then follow the path uphill heading SW, with the field on your left and the hedgerow on your right, see yellow arrow on the image above.

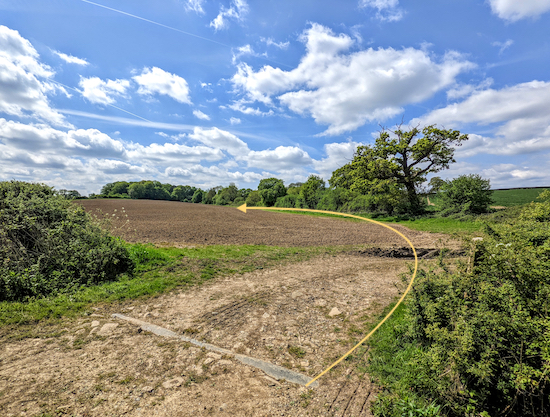
Head diagonally uphill towards a tree on the left (see yellow arrow)
4: After 240m the path veers left (location - https://w3w.co/twig.rings.boxing) heading diagonally uphill for 110m towards a tree on the left across a field (location - https://w3w.co/games.gross.damp), see yellow arrow on the image above. Continue SW for 410m, with the woodland on your right and the field on your left, until you reach a gate leading to Grubbs Lane (location - https://w3w.co/song.remind.small).

The view from the top of the hill after point 4 looking back towards Wildhill Image by Hertfordshire Walker released via Creative Commons BY-NC-SA 4.0
The view from the top of the hill after point 4 looking back towards Wildhill
5: Turn right on Grubbs Lane and head NE for 230m looking out for a footpath on your right soon after Westfield Lodge (location - https://w3w.co/blitz.wants.pardon), see image below.

The footpath heading NNW off Grubbs Lane 60m beyond Westfield Lodge
6: Turn right off Grubbs Lane on Hatfield footpath 82 then cross the fields walking diagonally NNW for 610m heading to the left of the pylon. Continue through another field for 230m heading for the woodland, then follow the path for another 280m NW then WNW until you reach an area where farm equipment and building rubble is stored (location - https://w3w.co/acid.relax.frost).

Turn left through the building material, see yellow arrow on image
7: Turn left through the building material (see direction of yellow arrow on the image above), then head SW on Hatfield footpath 81 for 380m, keeping the hedgerow on your right and the field on your left, cross a field and emerge on Grubbs Lane (location - https://w3w.co/table.treat.guides).

8: Turn right, then right again on Woodside Lane and head NW for 220m where you take the right fork (location - https://w3w.co/flags.spots.humble) and continue along Woodside Lane until you meet Wildhill Road (location - https://w3w.co/cross.richer.retain) opposite a large house with metal railings called St Michaels.

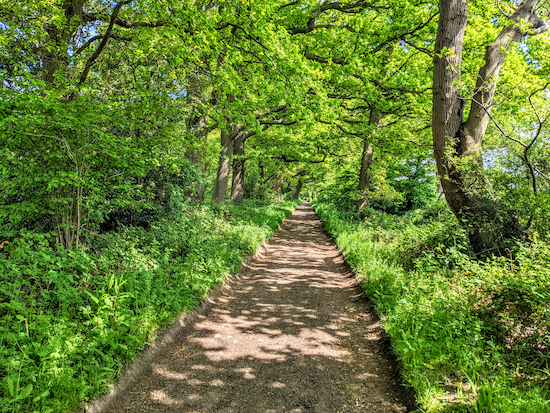
9: Turn right on Wildhill Road then head NE for 50m before turning left along a byway that heads NW alongside St Michaels (location - https://w3w.co/phones.shiny.coast). This byway is called Green Street. It is also Hatfield BOAT 80 (byway open to all traffic). Follow this tree-lined byway as it heads NW, then NE, then E for 1km.

The lovely Green Street heading E beyond point 10
10: After 1km you will reach a junction (location - https://w3w.co/lock.libraries.hype). Ignore the byway on your right and continue heading E for 850m until you reach West End Lane (location - https://w3w.co/frozen.silver.snake).

11: Turn right on West End Lane and head S for 600m, following the lane to the T-junction (location - https://w3w.co/fuel.full.rental). Turn left and return to The Woodman car park.

Interactive map


Walk 95: Ware West Loop

4 miles (6.4 km) with 34m total ascent


The stretch of the Hertfordshire Way between points 8 & 9 below Image by Hertfordshire Walker released via Creative Commons BY-NC-SA 4.0
The stretch of the Hertfordshire Way between points 8 & 9 below
This walk starts and finishes in Ware. It follows the River Lea (also known as Lee) Navigation tow path west to Hartham Common in Hertford, then loops back along the Hertfordshire Way. If you are interested in bird watching, you might want to take your binoculars because you pass King’s Meads, which, according to the Herts & Middlesex Wildlife Trust is one of the largest water meadows in Hertfordshire, with 119 bird species recorded as well as 265 different species of wildflowers. The return route passes the site of the former Coleman-Theobald Mill.

Directions


Map for Walk 95: Ware West Loop Created on Map Hub by Hertfordshire Walker Elements © Thunderforest © OpenStreetMap contributors There is an interactive map below the directions
Map for Walk 95: Ware West Loop
Created on Map Hub by Hertfordshire Walker
Elements © Thunderforest © OpenStreetMap contributors

There is an interactive map below the directions
Those with GPS devices can download GPX or KML files for this walk. We've added What3Words location references for those who use that system. If you print these walks you might want to use the green PrintFriendly icon at the bottom of these directions to delete elements such as photographs.

If you are travelling by car, you can use the pay-and-display car park, known as the Library Car Park, off Burgage Lane (location - https://w3w.co/poems.chains.phones). We parked for four hours to allow for a lunch stop in a nearby restaurant after our walk. The car park is ideally situated for many eating places and pubs.

1: Take the footbridge in the SE corner of the car park (location - https://w3w.co/upset.points.slope) and cross the River Lea Navigation, turning right on the south side. You turn right and head SW, W, NW, and SW again along the southern bank of the waterway on Ware Town footpath 18. After 1.3km you will reach the A10, which passes overhead (location - https://w3w.co/lamps.refuse.voted).

A narrowboat on the River Lea Navigation   Image by Hertfordshire Walker released via Creative Commons BY-NC-SA 4.0
A narrowboat on the River Lea Navigation
2: Go under the A10 and continue heading NW then SW for 550m, now on Hertford footpath 99, until you reach New Gauge (location - https://w3w.co/tracks.loves.snack), the pump house at the start of the New River - an artificial waterway opened in 1613 to supply drinking water to London.

The River Lea Navigation at the junction with the New River, mentioned in point 2 above  Image by Hertfordshire Walker released via Creative Commons BY-NC-SA 4.0
The River Lea Navigation at the junction with the New River - point 2

New Gauge at the start of the New River  Uploaded to Wikimedia Commons by Stephen Dawson released via Creative Commons BY-SA 2.0
New Gauge at the start of the New River 
3: Continue heading W and SW and follow the track for 770m, now Hertford footpath 33, to Hertford Lock (location - https://w3w.co/ever.trash.motor).

The path leading from New Gauge to Hertford Lock   Image by Hertfordshire Walker released via Creative Commons BY-NC-SA 4.0
The path leading from New Gauge to Hertford Lock

The approach to Hertford Lock - you cross the bridge at this point  Image by Hertfordshire Walker released via Creative Commons BY-NC-SA 4.0
The approach to Hertford Lock - you cross the bridge at this point

Cross Hertford Lock to reach Hartham Common, see point 4 below  Image by Hertfordshire Walker released via Creative Commons BY-NC-SA 4.0
Cross Hertford Lock to reach Hartham Common, see point 4 below
4: Here you turn right on Hertford footpath 23 and cross the River Lea Navigation via the lock gate bridge (location - https://w3w.co/brush.cares.precautions). Continue past the lock-keeper’s cottage on your left, and follow the path across Hartham Common and head NW for 280m until you reach a footbridge (location - https://w3w.co/tent.navy.rental).

5: Turn right to cross the footbridge, which is Hertford footpath 20, and then, once on the other side, follow the path, Hertford footpath 19, as it continues to head NW for 200m until you reach another footbridge (location - https://w3w.co/lifts.fact.dwell).

The footbridge mentioned in point 5 above. Turn right after crossing Image by Hertfordshire Walker released via Creative Commons BY-NC-SA 4.0
The footbridge mentioned in point 5 above. Turn right after crossing
6: Immediately after the footbridge take the path on your right, Hertford footpath 17, as it heads NE for 140m to another footbridge (location - https://w3w.co/until.camp.lied), this time crossing the River Rib. Follow the path round to your left.

The footbridge over the River Rib, mentioned in point 6 above Image by Hertfordshire Walker released via Creative Commons BY-NC-SA 4.0
The footbridge over the River Rib, mentioned in point 6
7: When you reach Ware Park Road (location - https://w3w.co/tides.dare.cliff), turn right and then take the first turning on your right. This is the Hertfordshire Way, Hertford bridleway 97. Take this track as it heads SE then E passing cottages on your left and following the river on your right. After 600m you will reach the site of the former Coleman-Theobald Mill (location - https://w3w.co/valve.scan.left), at this point you are walking on Hertford restricted byway 97.

The site of the former Coleman-Theobald Mill, mentioned in point 7 above Image by Hertfordshire Walker released via Creative Commons BY-NC-SA 4.0
The site of the former Coleman-Theobald Mill - point 7
8: After leaving the site of the mill, continue heading E and then NE along the Hertfordshire Way for 600m until you see a step stile on your right (location - https://w3w.co/tubes.slate.fears).

The step stile mentioned in point 8 above - take this as it drops down towards the river Image by Hertfordshire Walker released via Creative Commons BY-NC-SA 4.0
The step stile leading down towards the river (point 8)
9: Take this path, Hertford footpath 100, as it heads E for 100m until it goes under the A10 (location - https://w3w.co/torn.bigger.baking). The path then climbs up to playing fields, now Ware Town footpath 16, where it bends to the right of the football pitches (location - https://w3w.co/mount.craft.harder) and then heads ENE for 350m.

The path skirting to the right of the playing field mentioned in point 9 above Image by Hertfordshire Walker released via Creative Commons BY-NC-SA 4.0
The path skirting to the right of the playing field mentioned in point 9
10: At the end of the playing field, the path swings to the left to reach another footpath (location - https://w3w.co/baked.stick.grades). Here you turn right and take Ware Town footpath 17 over the footbridge crossing the River Lea Navigation. After crossing the river, turn left (location - https://w3w.co/maple.probe.stays) and retrace your steps along Ware Town footpath 18 for 990m back to the car park.

Interactive map


Facebook group rules

Facebook group rules
We have set 10 rules for our Hertfordshire Walker Facebook group which are designed to help keep the group focused on walking in the Hertfordshire countryside

Supported Charity: The Trussell Trust

Supported Charity: The Trussell Trust
Supporting those locked in poverty

Search This Site